[RN] Getting started with plain React Native
If you are already familiar with mobile development (or if you can't or don't want to use Expo), you may want to use the React Native CLI. This requires Android Studio or XCode in order to get started. If you already have these installed, you should be up and running within minutes. If not, you should expect to spend an hour or so on installing and configuring them.
Note! If you are using a Windows or Linux machine, you won't be able to build the iOS app, but you can build the Android one. This is why a lot of React Native developers end up using MacBook Pros, since this way you can work on both native apps are the same time. If you want to test on your own iOS device but you don't have a Mac, you may want to look into using Expo instead.
For getting started, follow the React Native CLI quickstart in the environment setup guide until the section titled "Creating a New Application". If you are on a Mac, you may want to choose iOS for this workshop, as the setup tends to be easier than Android on a Mac. Once you're done, let's pick up from "Creating a New Application" together.
Creating a New Application
Now that we've got all the environment prep out of the way, let's get started and create our application. Open your terminal and run:
npx react-native init AwesomeProjectHere, npx is a command line utility that's bundled with npm (installed with Node.js) and allows you to run command line programs from npm without globally installing them. react-native init AwesomeProject tells the cli tool to create a new project called AwesomeProject. You can use a different name if you prefer.
Now it's time to run the project! For native projects, we need to do two things:
- start the packager that inserts our JavaScript code into our app
- build the native app
First, lets start the packager:
cd AwesomeProject
npm run start
You can omit this step if you want, since the run command does also open a new window with and starts packager automatically, but I always do it explicitly, since I like knowing that the packager is up to.
iOS - running on a simulator
Open a new terminal window, navigate back to AwesomeProject and run:
npx react-native run-iosThis usually takes a little while to build, but once done it'll open your default simulator.
iOS - specifying a simulator
The run-ios command will always launch the app on your default simulator. However you might want to test your app on a different simulator. To do this, you can use the --simulator command line argument. For example to run run the app on your iPhone XR simulator, you can do the following:
npx react-native run-ios --simulator="iPhone XR"iOS - running on a device
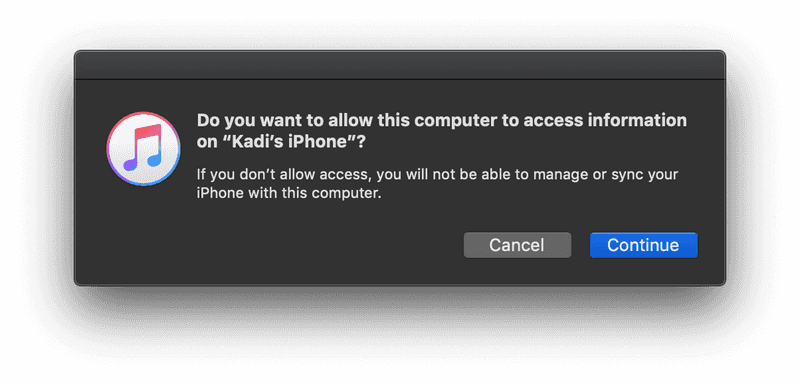
First, connect your phone to your MacBook. If you've never done this before, you should get a prompt from iTunes permission dialog:
After you click "continue", you should get an alert on your phone asking you to confirm. If you missed the alert or pressed "no" by accident, just unplug and plug in your phone again to be re-prompted.
Now you'll need to find you your phone's name. To do this, open your terminal (with the phone plugged in) and do:
instruments -s devicesThis will list all the devices (real and simulated) available on your computer. I never changes my phone's name, so it's set at the default: "Kadi’s iPhone" (notice the fancy ’ - this is important).
Now open the terminal in your project root directory (inside AwesomeProject) and run
npx react-native run-ios --device="Kadi’s iPhone"Where "Kadi’s iPhone" is the name of your phone. Note that this will take a little while to build, and you have to make sure your device is unlocked while the installation is taking place.
Android - running on an emulator
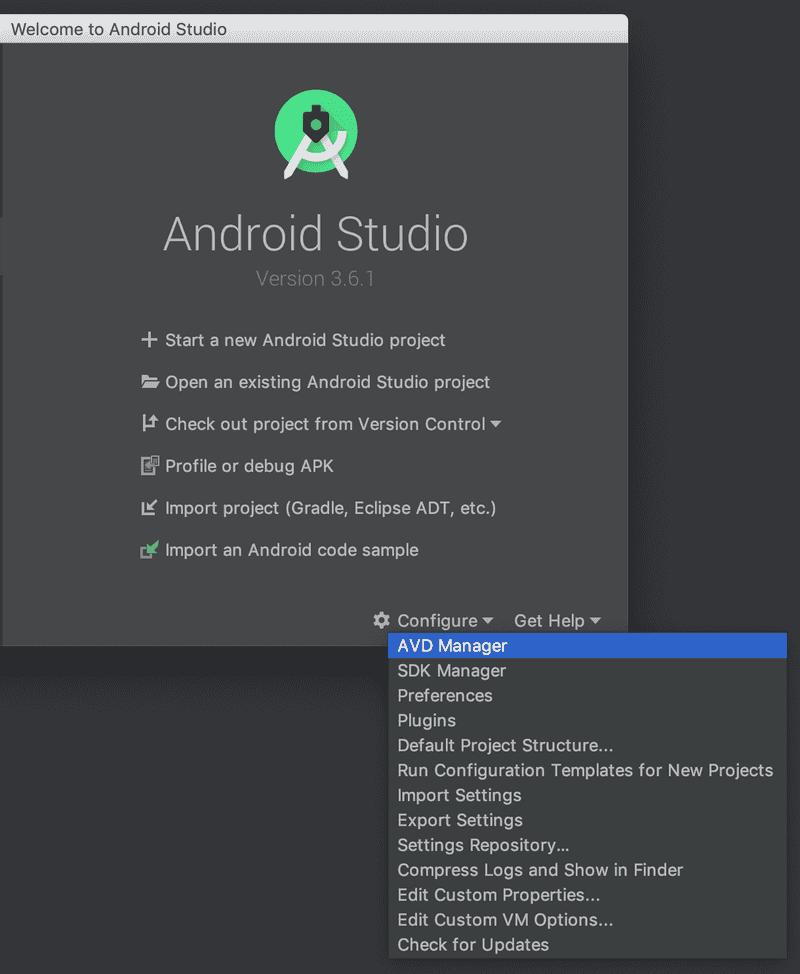
First, we need to open an emulator. iOS simulator gets opened automatically, but for Android you'll have to do it yourself. Open Android Studio, click on the "Configure" option and choose "AVD Manager". AVD stands for "Android Virtual Device" and this is the menu where you can install, delete, edit and run emulators from.
Here you can create a new virtual device if you don't have on yet. Once you have a device, double click on it to launch.
Now that the emulator is running, open a new terminal window, navigate back to AwesomeProject and run:
npx react-native run-androidThat's it! You're now up and running on your android device.
Android - running on a device
In order to run your app on your device:
- close the Android emulator (if you had it open)
- plug in your phone via USB
- enable USB debugging*
* To enable USB debugging on your device, you will first need to enable the "Developer options" menu by going to Settings → About phone and then tapping the Build number row at the bottom seven times. You can then go back to Settings → Developer options to enable "USB debugging".
For any platform-specific issues and nuances, consult the documentation.
Emulator vs Simulator
You may have noticed we've been saying "iPhone Simulator" and "Android Emulator". This is intentional. The difference between emulators and simulators is that emulators mimic the software and hardware environments found on actual devices. Simulators, on the other hand, only mimic the software environment; they otherwise have access to all of the host system's hardware resources such as disk space, memory and processor speed. This means that on Android Emulators, you can be reasonably confident that the physical device will act similarly to the emulator. iPhone simulators however are free from hardware constraints such as running out of memory. This is why it's important to test your iPhone app on a real device if at all possible before publishing to the store.
🔗 RN 0a65fa34b6d9f0186c38d78f2e18e2cf0bfc3ca2
Folder Structure
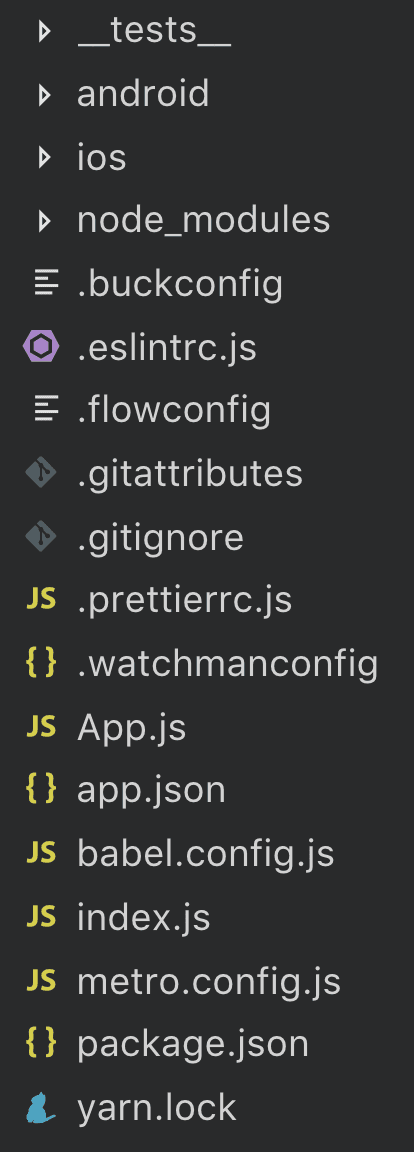
Your folder structure looks a little something like this:
If you also looked at the Expo setup guide you'll notice that there's a lot more going on in this template. Here are the highlights:
index.js- this is the main entry point of your application. It is equivalent to React on the web mounting the project to the root DOM nodeApp.js- this is the file that we care the most about. This is where we'll be writing all our code/androidand/ios- these are the folders where all the native code lives. If we needed to add or edit any platform specific native code, this is where we'd have to look. We also need to go into these folders if we have to install any native libraries.buckconfigand.flowconfig- the facebook react native template comes with flow pre-installed. Using this is optional though and we will be sticking with plain React Native in this workshop..prettierrc.jsthis is a code formatter which is again optional, but you can read more about it in our code style chapter


