[Expo] Getting started with Expo
The fastest way to get started with React Native is to us Expo and run the app on your device. Feel free to use the React Native docs or Expo docs for reference.
You'll need:
- a computer (Mac, Windows or Linux)
- a smartphone (iPhone or Android)
Install Node
First, make sure you have Node.js installed (12 or later). You can do this by opening a terminal and running node -v. If not you can install it here. There's usually two versions to choose from, pick the one that says LTS (Long Term Support) after the version number.
Install Expo
npm install -g expo-cliThis installs the expo cli globally. We'll be using this to create our new project.
Create the project
expo init AwesomeProjectYou'll be prompted to choose a template. Pick 'blank' - we're starting from scratch!
Run the project
cd AwesomeProject
npm start
Note that you can also use expo start or yarn start if you have yarn installed.
Preview the app on your phone
First, make sure that your phone is connected to the same WiFi network as your computer. This is really important!
Next you'll need to install the Expo client on your phone. This is the native shell Expo provides that lets you get started without having the build the native app yourself. Go to the App Store or Play store, search for "Expo" and install it. You will also have to create an Expo account if you don't already have one (don't worry - it's free!).
Finally, open the browser window that was opened when you ran the packages. See the QA code? If you're on Android, you can scan the code with your Expo app. On iOS, open the camera app to can the code. You will be prompted to "open in Expo".
At this point you should see something like this:
And that's it! You're ready to start coding!
🔗 Expo dd3bca50a532c90902252a3e9dcd0ef608000ee8
Folder Structure
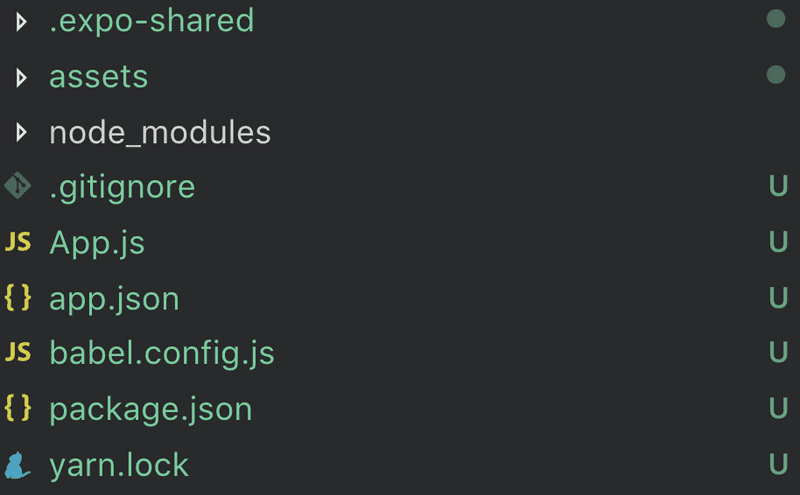
Let's have a look at what the plain Expo application template looks like:
This is that my project structure looks like. Yours should look very similar. Let's see what's going on one by one:
/.expo-shared- this is an expo internal folder, no need to peek in there/assets- this is where we store any assets we may want to use in our application, like images, videos, fonts and icons/node_modules- these are all the packages we have installed that make up Expo and React Native. Whenever younpm installa new package, it gets added here. This folder should never be checked into source control.gitignore- this is a file to tell .git which files and directories we want to omit from course control.node_modulesis listed thereApp.js- the main entry point to our application. This is where you'll start adding code!app.json- another config file, mostly for expo metadatababel.config.js- babel config, used to add the expo presetpackage.json- this is where you list dependencies and add scriptsyarn.lock- you might not have this, but I hadyarninstalled, so expo added all my dependencies using yarn
All in all, the only files you will really focus on are the App.js and package.json

