Build the iOS app
info
To build the iOS app, you will need to use an Apple Mac. Unfortunately there is no way around it. This is because the Xcode and its build tools are only available on computers running macOS.
There are two ways to build an iOS app - you can use the react native cli on the terminal, or you can build it using Xcode: Apple's integrated development environment (IDE) for building iOS apps. We are now really venturing into native development in that these are the tools that native iOS developers would use.
Installing dependencies (FYI, but you can skip this)#
Because we initialized our project using a template, the React Native CLI has kindly installed all the dependencies for us (which is why the init command tends to take so long). However you should still know how to install dependencies, e.g. if you were working within a team and cloning the project from GitHub.
First, we'll need to install the JavaScript dependencies:
yarn# ornpm installNext, because we are now building a native app, not just the JavaScript bundle, we'll also need to install the native dependencies.
For iOS, the build dependencies are managed using CocoaPods (or "Pods" for short). You can think of this as the iOS version of npm. To install the iOS native dependencies we'll need to run the install command in our project's ios directory:
cd iospod installThe Pods dependencies work similarly to JavaScript dependencies that you are already familiar with. In the case of JavaScript dependencies, we have:
package.json- list of dependenciesyarn.lock- an auto-generated file that records exact versions of your dependenciesnode_modules- all the project dependencies (not checked into .git)
CocoaPods work on a very similar way:
ios/Podfile- list of dependenciesios/Podfile.lock- an auto-generated file that records exact versions of your dependenciesios/Pods- all the project dependencies (not checked into .git)
Running the iOS app (via Xcode)#
While you can run your app from the cli, it is often better to build using Xcode as you get more control over the build. It is also very handy when changing native code or debugging build errors.
Start packager#
First open the terminal and start the metro bundler:
yarn start# ornpm startTechnically this is optional - if you don't do this yourself, react native will open a new terminal window and do it for you, but I prefer the control of doing this manually.
Run the app via Xcode#
Open Xcode (open spotlight search with cmd + space and type in "xcode"), choose "Open a project or file" and open the ios/MoodTracker.xcworkspace file. You can also select the whole ios directory and Xcode will automatically open the workspace file.
danger
When opening your project in Xcode, ensure you openen .xcworkspace and not the .xcodeproj file. Although both will open in Xcode, the project file does not recognize Pods and so you won't be able to run your app.
Now at the very top of the window you will see MoodTracker > [some device name]. Click on the "MoodTracker" to choose which simulator to run the project on. After you've chosen your preferred target, click on the "Play" icon to run your app.
Debugging build errors#
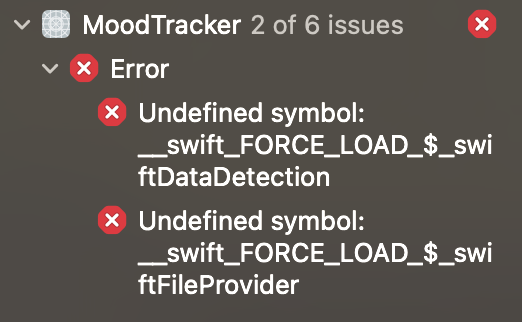
You may get the following build error when running the app:

This would be because the recently release Xcode 13 supports Swift by default, but the TypeScript template project doesn't include a Swift file.
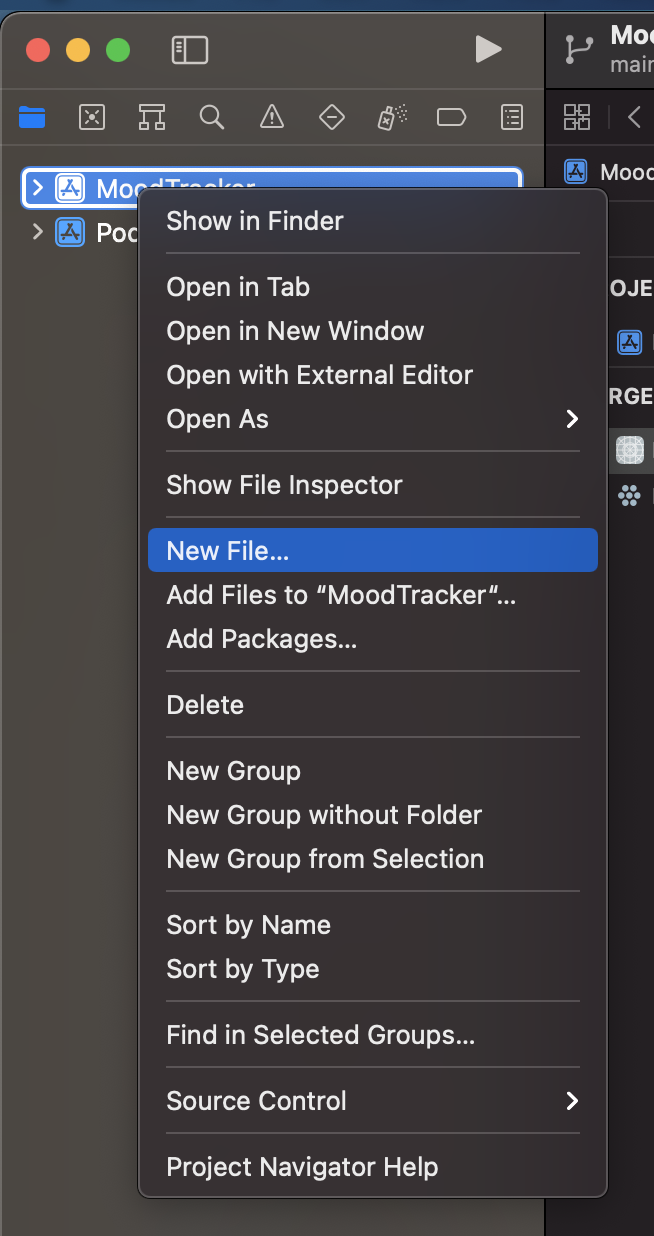
To fix this, click on the folder icon to see your project structure -> right click on the project folder -> choose "New File".

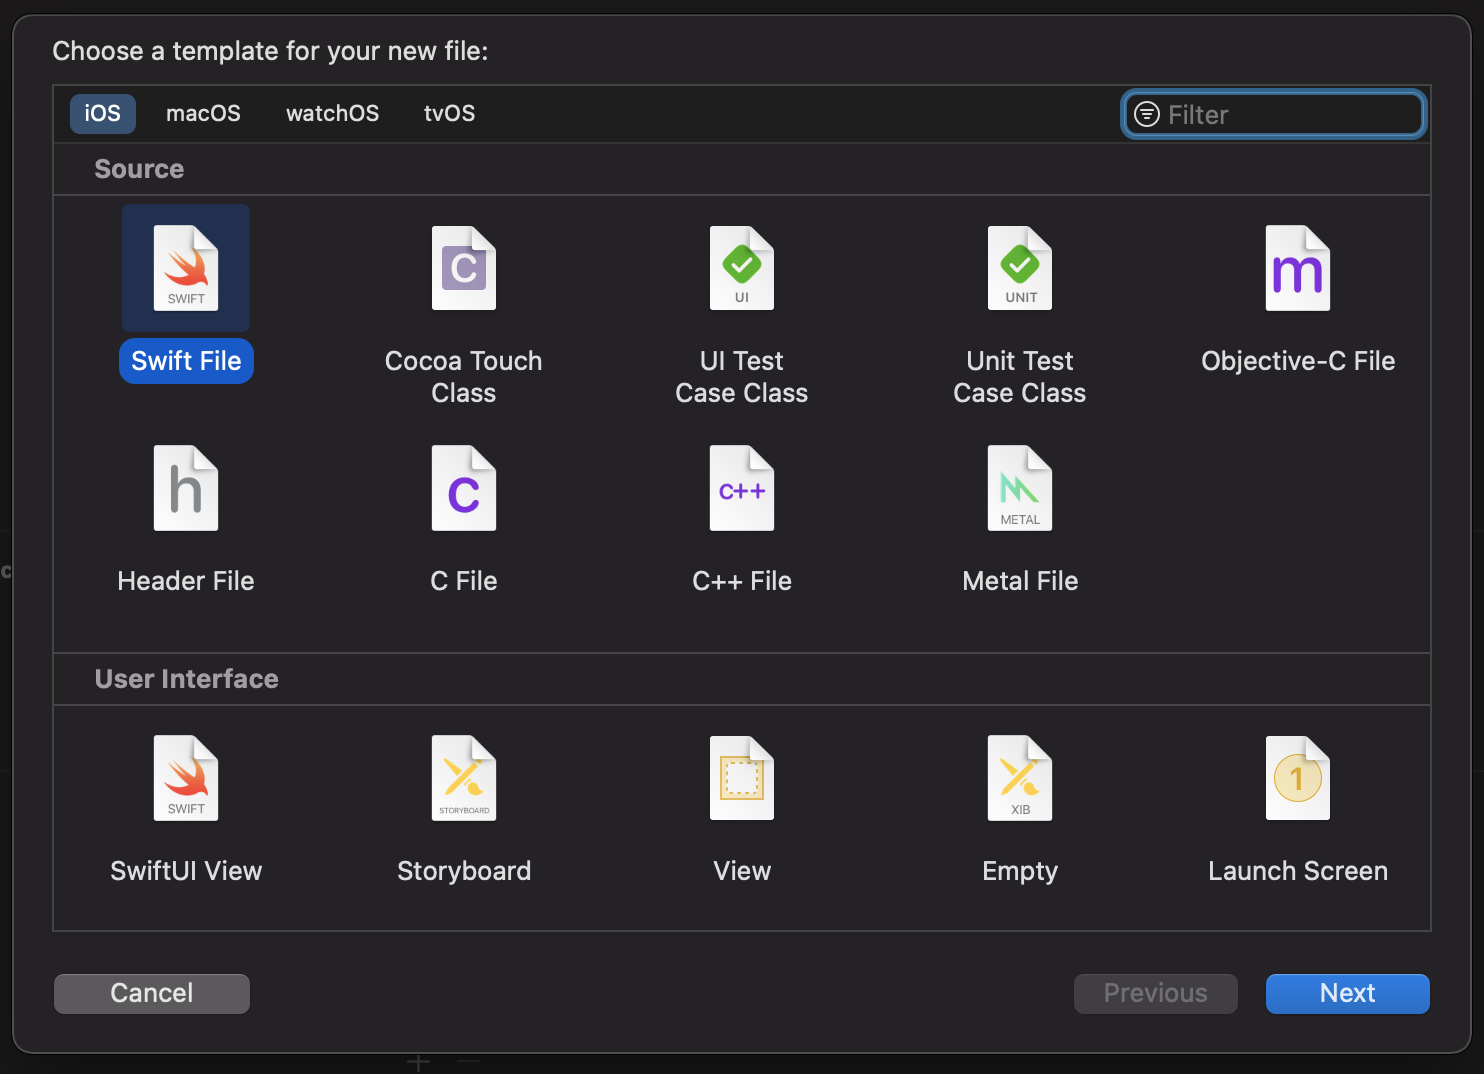
From here, choose "new Swift file"

Name it anything you want. I named mine "dummy" for a dummy file.
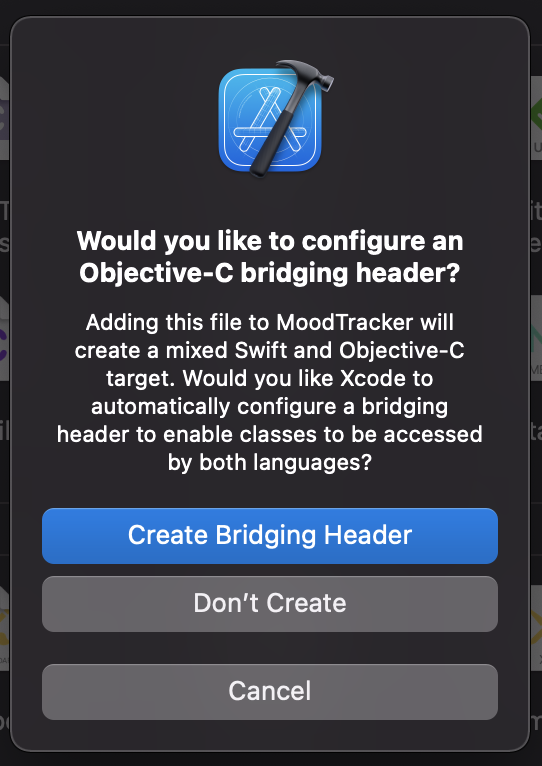
After you hit create, you should see this popup that asks you whether you want to add the Objective C bridging header.
Choose "Create Bridging Header".

And finally rebuild your project.
Running the iOS app (via the terminal)#
Start packager#
In one tab, start the metro bundler
yarn start# ornpm startTechnically this is optional - if you don't do this yourself, react native will open a new terminal window and do it for you, but I prefer the control of doing this manually.
Run the app via the cli#
In another tab, build the native app
yarn ios# ornpm run ios